Category: tech

  • Embracing AI for bird calls in this year’s Big Garden Bird Watch

    In recent years, I’ve become a regular participant in the RSPB’s Big Garden Birdwatch, contributing my citizen science data to help track the UK’s garden birds. This year I took a different approach – relying not just on my eyes, but using BirdNET-Pi, which harnesses AI to identify bird calls from audio, creating a richer picture of the birds in my neighborhood.

    BirdNET-Pi is an open-source project available on GitHub designed to run on a Raspberry Pi, a small and affordable computer. After setting up BirdNET-Pi, I can easily access a comprehensive dashboard via a web browser, where I can explore detailed information about the birds identified in my area from a microphone I snaked out my window.

    The assembled Raspberry Pi 5 complete with Pibow case, active cooler and microphone attached to the USB port

    Whilst there are countless guides on how to set-up BirdNET-Pi, I thought I’d share the details of my configuration.
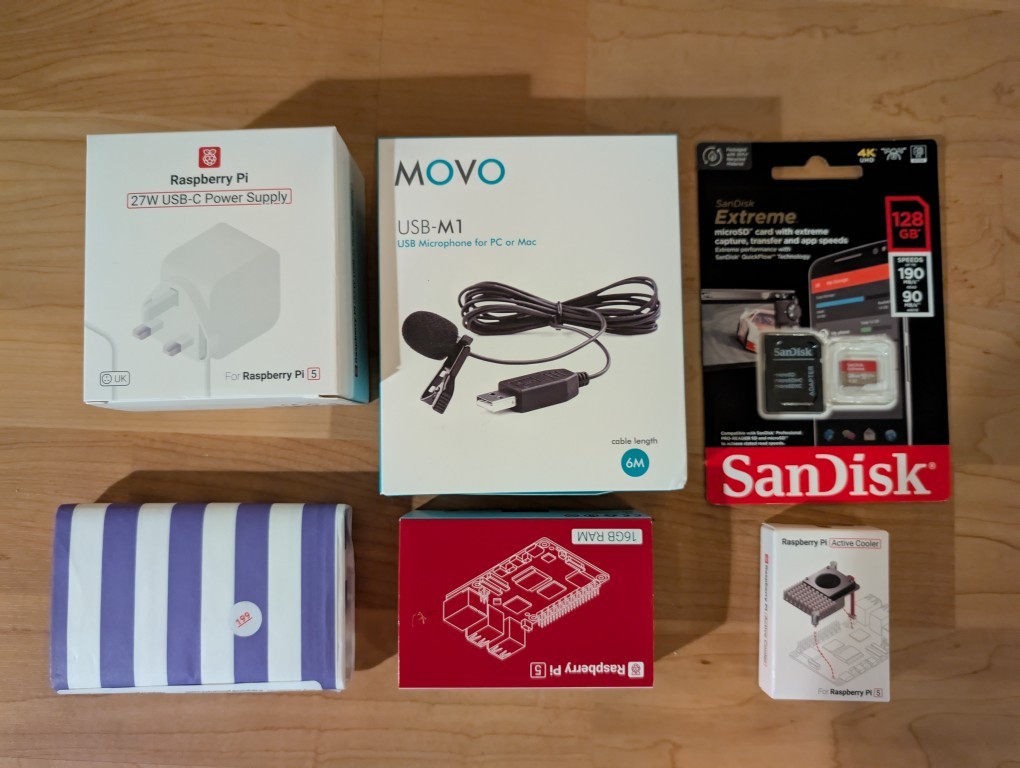
    The kit:

    • Raspberry Pi 5 (4GB model is fine, however I opted for 16GB)
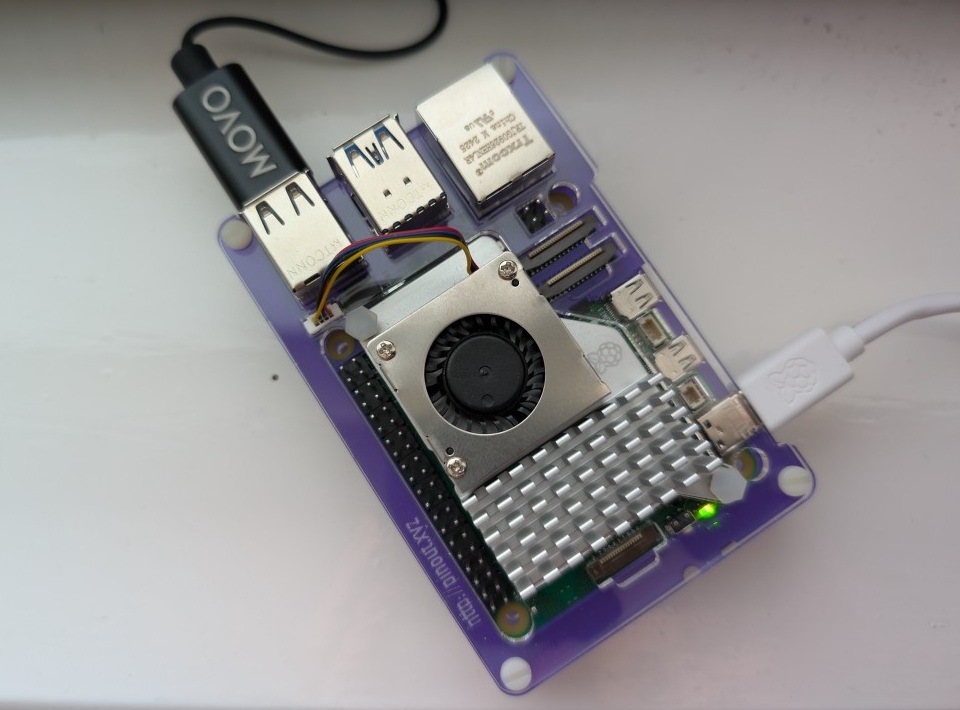
    • Raspberry Pi 5 Active Cooler. To take the heat off crunching those chirps!
    • Raspberry Pi 5 USB-C power supply
    • Pibow Raspberry Pi 5 case. Because it looks pretty cool and nicely fits around the active cooler.
    • SD card (for the OS image with ample capacity to store audio data – I purchased 128GB).
    • USB microphone (I purchased a Movo M1 USB Lavalier microphone, a relatively inexpensive option).
    Unboxing the Pi 5 – stage 1
    Unboxing the Pi 5 – stage 2

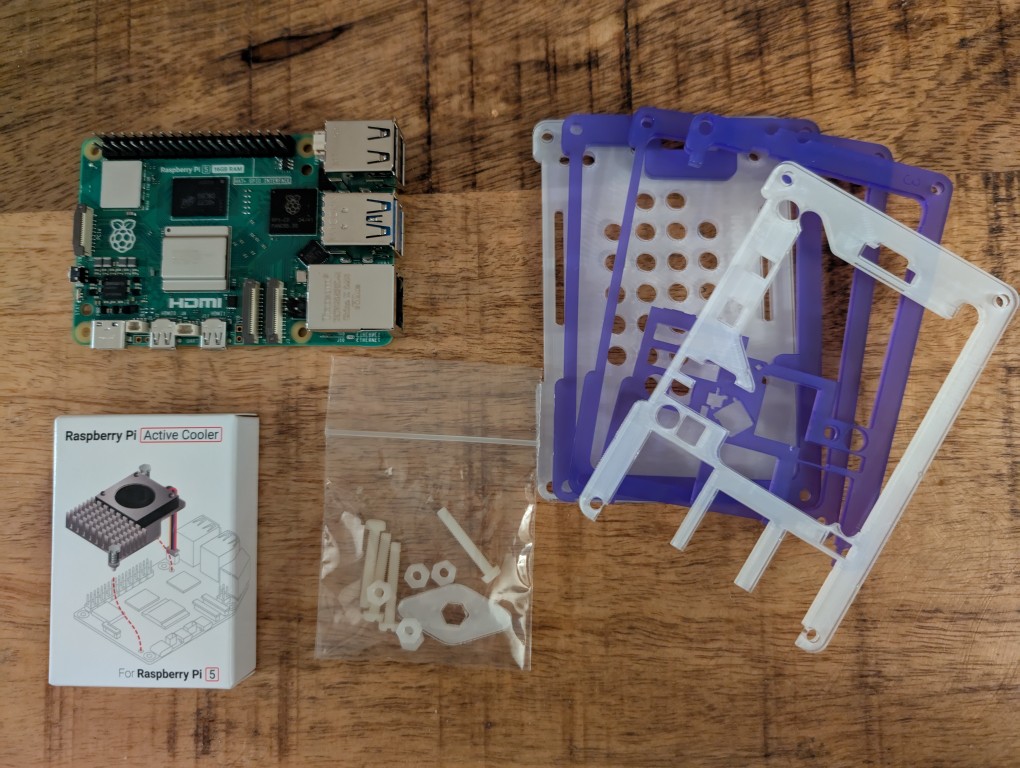
    The specific assembly instructions for the Pibow for Rasperry Pi 5 can be found at https://learn.pimoroni.com/article/building-your-pibow-5. The peripherals for Pi 5 can easily be swapped out for Raspberry Pi 4 (with the associated case, power supply and active cooler for 4).

    I’m going to skip straight to BirdNET-pi, as there are guides aplenty on how to set-up Rasperry Pi. However the official guide was enough to get up and running: https://www.raspberrypi.com/documentation/computers/getting-started.html.

    I installed BirdNET-Pi from a particular fork to ensure compatibility with the Raspberry Pi 5, which runs on the Debian Bookworm OS: https://github.com/Nachtzuster/BirdNET-Pi

    The installation worked without a hitch, perhaps a moments delay before the data began to flow in and I was able to locate my installation on my local network under birdnetpi.local.

    BirdNET-pi has support for Apprise – a notification library that can be configured under via the Settings menu. For example, I subscribed to MQTT (a type of message broker) to join a community network of BirdNET-Pi devices in my locality, enabling us to share bird detection data and collaborate on monitoring local bird populations.

    BirdNET-pi in action!

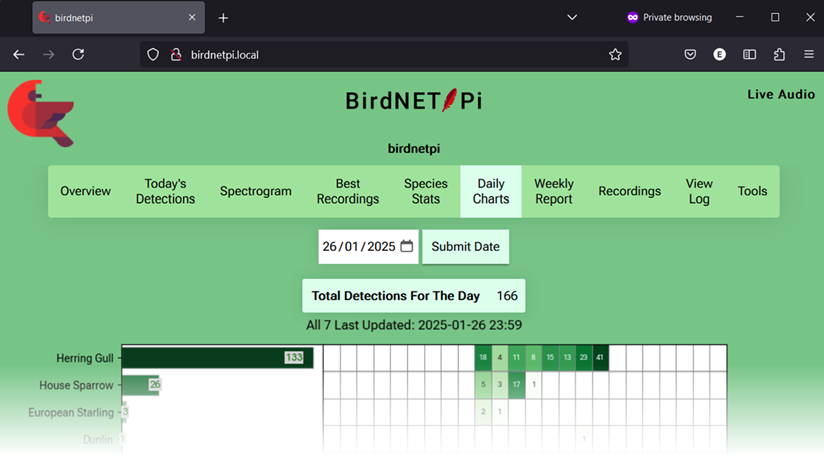
    So how about the Big Garden Bird Watch results? Herring Gulls, House Sparrows and Starlings amongst the most numerous detections were of no surprise. Undetected by BirdNET-pi were my more silent avian neighbours, a flock of Feral Pigeons and a pair Carrion Crows. However a couple of detections BirdNET-pi made irrespective of what I saw included the Eurasian Oystercatcher, Dunlin and Common Goldeneye. Oystercatchers and dunlins are regulars in my neighborhood, but I’ve never spotted a Goldeneye -though the audio recording sounded legit! And my most counted bird? The feral pigeon!

    Not only was this is a novel way for doing the Big Garden Bird Watch this year, the motivation to get my own kit came after learning about the Dundee Bionet, a network of acoustic bird detectors spread across green spaces and community gardens in Dundee.

    This is only just the beginning of my foray into bird audio data – stay tuned for what projects take flight next!

  • AWS serverless in 2024 : SAM, Lambda, API gateway, DynamoDB Cognito and OpenAPI standard

    Introduction:

    In 2024, an AWS serverless architecture continues to be a popular choice for building scalable and cost-effective applications. With a service stack using SAM (AWS Serverless Application Model), AWS Lambda,  API Gateway, DynamoDB, Cognito, and OpenAPI standard; developers can create serverless solutions with ease. This guide will walk you through the process of setting up a project with these AWS serverless components. dotnet 6 was the chosen Lambda runtime.

    This example was developed as an example game back-end, however this architecture can apply to a number of real-world scenarios including web applications.

    To summarise the chosen the role of the services in the chosen stack:

    1. SAM (AWS Serverless Application Model): A framework to simplify serverless application development that serves as an extension of CloudFormation.
    2. AWS Lambda: Implement business logic with serverless functions.
    3. API Gateway: Create APIs to enable back-end communication.
    4. DynamoDB: Store application/game data.
    5. Cognito: Managed service for authentication and authorisation.
    6. OpenAPI standard: Declarative syntax for creating clear and consistent APIs to be shared amongst developers.

    Part 1 – Initial Setup:

    1. Install AWS CLI and Setup with AWS SSO:
    •    Install the AWS CLI, which allows you to interact with AWS services from the command line.
    •    Set up AWS Single Sign-On (SSO) and use the aws sso login command to refresh your credentials.
    1. Install SAM and Docker Desktop:
    •    Install the AWS Serverless Application Model (SAM) CLI, which provides a simplified way to build, test, and deploy serverless applications.
    •    Install Docker Desktop, as it is required for running functions locally.
    1. Create a SAM Project:
    •    Use the command sam init to create a new SAM project.
    •    Choose the AWS Quick Start Templates and select the Hello World Example.
    •    When prompted, I selected dotnet6 as the desired runtime.
    •    When prompted, select the desired package type (I used zip in this example).
    •    Change to the project directory using cd proj-name and launch VS Code with code ..
    1. Build and Test:
    •    Execute the command sam build to build the project.
    •    Test the project locally using sam local invoke HelloWorldFunction.
    1. Deploy:
    •    Deploy the project using sam deploy –guided.
    •    Review the changes to be deployed and confirm by typing ‘y‘.
    •    You can review the deployment in the AWS Management Console under CloudFormation.


    Part 2 – Modifying the Example SAM Template Project:

    1. Add OpenAPI to the SAM Project:
    •    If you already have an API definition, copy the YAML file into the SAM project.
    •    In the example project, delete the Events block in the HelloWorldFunction section.
    1. Add OpenAPI Definitions:
    •    Add the OpenAPI definitions for the /hello route to the SAM template.
    •    Include the necessary information such as the operationId, responses, and integration details.
    •    Pay attention to the x-amazon-apigateway-integration block.
    1. Add API Resource:
    •    Define the HttpAPI resource in the SAM template.
    •    Specify the AccessLogSettings and DefinitionBody using the Fn::Transform and AWS::Include.
    1. Build and Test the API:
    •    Start the API locally using sam local start-api.
    •    Verify that the HelloWorldFunction is mounted at http://127.0.0.1:3000/hello [GET].
    1. Add Permissions:
    •    Grant the necessary permissions to the HelloWorldFunction using the AWS::Lambda::Permission resource in the SAM template.
    1. Rebuild and Deploy:
    • Rebuild the project using sam build.

    Deploy the changes using sam deploy –guided.

    1. Test with Curl or Postman:
    •    Test the API by sending requests to the deployed endpoint using tools like Curl or Postman.


    Adding New Lambda Functions:

    1. Create Empty Constructor:
    •   To add additional functions to the same class file, create an empty constructor in the class.
    1. Add New Function Block to the Template:
    •    Add a new function block to the SAM template for each additional function.
    •    Specify the CodeUri, Handler, Runtime, MemorySize, Environment variables, and any required policies.


    Adding Authentication with Cognito:

    1. Create Cognito User in the Template:
    •    Add a parameter for the email address of the created user in the SAM template.
    •    Include a UserPoolUser resource with the desired properties.
    1. Deploy with Parameter Override:
    •    Deploy the template with the CognitoUserEmail parameter override using sam deploy –parameter-overrides CognitoUserEmail=email@example.com.
    •    This will email a password to the user specified in the parameter.
    1. Initiate Auth Response and Obtain IdToken:
    •    Use the AWS CLI command aws cognito-idp admin-initiate-auth to get the session token.
    •    Respond to the challenge to change the password and obtain the IdToken.
    1. Test Authentication:
    •    Use the obtained IdToken to make authenticated requests to the API using tools like Curl.


    Adding DynamoDB Integration to Lambda:

    1. Install Required Packages:
    •    Install the AWSSDK.SSO, AWSSDK.SSOOIDC, and AWSSDK.SecurityToken packages (required for local development).
    1. Batch Writing Data to DynamoDB:
    •    Convert JSON data to DynamoDB format using the aws dynamodb batch-write-item command.


    Conclusion:

    By leveraging a serverless stack of SAM, Lambda, API Gateway, DynamoDB, Cognito, and the OpenAPI standard you can enjoy the benefits of serverless computing in reduced operational overhead, automatic scaling and pay-as-you-go pricing, allowing you to focus more on innovation and less on infrastructure management.